hamsterhappy.co.uk is a participant in the Amazon Services LLC Associates Program and other affiliate advertising programs designed to provide a means for us to earn fees by linking to Amazon.com and affiliated sites. Affiliate links may be used on this page and in hamsterhappy.co.uk articles, but they do not impact on the price that you pay and they do help me to get this information to you for free. Read my privacy policy for more information regarding affiliates.
Are you looking for ways to entertain your hamster or want to know how your little bestie can play in the house without getting lost? Consider a tunnel! A tunnel is a great way to provide opportunity for exploration. Plus, it will help reduce any negative behavior like overgrooming, which often happens when they are bored.
In this article, we’ll be discussing:
- What tunnels are and what they do.
- Why tunnels are an essential tool in the cage of any pet hamster – How tunnels can help make your pet more comfortable and reduce any negative behavior like overgrooming that typically occurs when they get bored.
- The different types of tunnels available and how to choose the best tunnel for your hamster.
- Instructions on how to make your own tunnel at home if you’d like to save a few bucks and have some fun in the process.
- How to teach your pet hamster to use the tunnels in their cage.
- Lastly, I’ll be sharing some tunnels I made for my pet hamsters with pictures and instructions so you can have a few ideas if you’d like to make one yourself!
What are tunnels anyway?
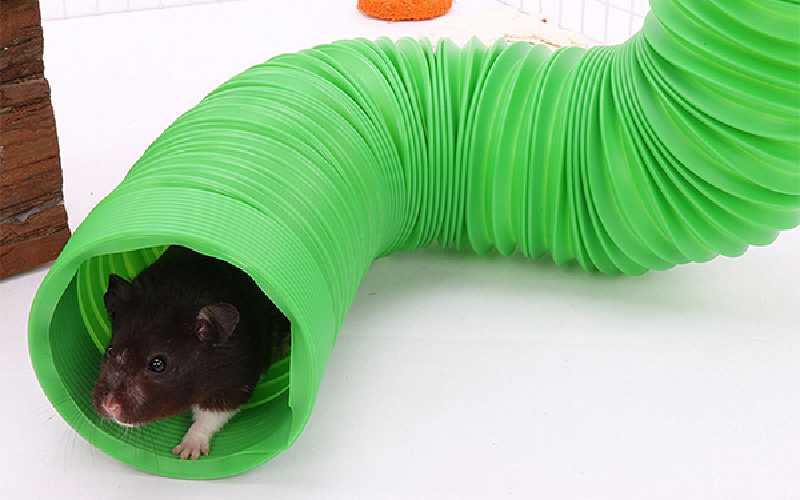
Tunnels are plastic or fabric tubes commonly found in hamster cages. They provide your hamster with a place to run, play, and hide. Tunnels can be used for a lot of different things. Some people use tunnels to make their hamster feel less exposed and more safe when they are out exploring the cage or in public. They can also help reduce any negative behaviors like overgrooming which is common in bored hamsters. If there are two hamsters sharing a cage, you can use tunnels to connect their homes together in order to provide them with some extra space. The possibilities are endless!
What types of tunnels are there?
There are many different sizes and shapes of tunnels that you can purchase from pet stores or online. They are made out of many different materials and have a variety of purposes. Some tunnels are small, like those used for mouse or gerbil cages. They are sturdy and less likely to move around when the hamster is running through it. Larger tunnels, however, can be used as an extension (or even replacement) for the main tube in a cage or hamster habitat. It’s best to try different sizes and shapes and see which you like best!
Why are tunnels so important?
They provide the hamster with more space to explore. As mentioned before, they help reduce any negative behaviors such as overgrooming and other signs of boredom by giving your pet plenty of space to exercise in their cage. They provide mental stimulation. Tunnels are very fun to play with and your hamster will love them! They are also a great tool to help hamsters burn off excess energy which can help prevent obesity. When used in conjunction with a wheel, you can bet your hamster will get plenty fit!
How can tunnels be used to make my pet more comfortable?
Tunnels provide the hamster with more space to escape the sight of their owners when they want more privacy. This is especially helpful for those who have multiple pets and others who live in small apartments where there is little privacy. Tunnels can be used to give the hamster a place to rest (other than your arms) which gives the pet a nice break from being held and cuddled. Tunnels are great for those who live in colder environments. Not only do they provide more space, but they also help keep the pet warm by providing space for them to sleep and huddle together in a big pile!
How can tunnels reduce negative behavior like overgrooming?
Tunnels are a very fun toy that is sure to occupy your hamster for hours! Because of this, there is less time for negative behaviors like overgrooming which commonly occurs in bored hamsters. Tunnels are a great way to burn off excess energy too. Because of this, your pet is less likely to pick on themself as much.
How do I make tunnels for my hamster(s)?
If you have a large piece of fabric and access to a sewing machine, this may be the easiest way to make your own tunnels at home! You can also try origami (I’ll share a few instructions at the bottom of the article) which can be done with less material and is easy enough for most beginner crafters. Of course, you can always purchase tunnels from a pet store if you’d like!
Step 1: Gather Your Materials
-Fabric (soft and thick for comfort)
-Sewing machine and thread.
-Scissors
Notes: Experienced seamstresses may find these instructions a bit too simplistic. Feel free to improvise or make changes if you have a different idea in mind! I made this video as an easy guide for those who are new to sewing or have never made tunnels before. If you’ve made your own tunnels before, I’d love to see them! Share photos with me on twitter (@andrea_hammy) or instagram (@hamsterandmore)!
- Cut your fabric into 1 inch wide strips. These will be used to tie the ends of the tunnel together in step 3. Make sure enough extra fabric is left on each end so that you can tie it onto the starting end of the tube. (about 12 inches)
- Sew a long rectangle using lots of stitches all along one end, and one side of your tunnel that is about 4 inches tall by 2 1/2 inches wide. (The size of your tunnel may vary depending on how much fabric you have and the size of your hamster.) Leave the other side open so that you can fill it with treats or bedding.
- Now that you have a completed rectangle, simply tie both ends together with the 1 inch strips of fabric that were cut in step one. Of course, it’s a good idea to double knot it just to make sure there are no accidental escape attempts! If you’d like to add a little something extra, try putting some treats inside and tying off another piece of fabric over the opening!
- This is what your finished product will look like when it’s all tied off:
- Once the tunnel is all finished, your pet will immediately start to enjoy it!
- Make sure this is a supervised activity and check up on your hamster from time to time. Make sure there is enough space between your hamster and the tunnel so that they are not accidentally tearing through the fabric while playing and checking out their new toy.
- Now just sit back and watch them play!
Here are a few different methods for making tunnels at home:
If you enjoyed these instructions, please share with friends who also have hamsters! If you have any suggestions or questions about this guide, leave them below in the comments section.
If you enjoyed this article you might also like to read about Hamster Toys.

1 thought on “Tunnels for Hamsters”